Introduction
Welcome to our latest tutorial where we delve into the practical world of BricsCAD, a powerful tool for anyone in the design, surveying, civil engineering or landscape industries. Today, we’re focusing on a fundamental yet powerful technique – importing point data into BricsCAD and creating a TIN surface. Whether you’re modeling terrains or analysing geographical data, mastering this skill will significantly enhance your CAD capabilities.
For instance you may be a new customer wishing to activate the software for the first time. Alternatively you could be an existing customer with a Maintenance contract wishing to retrieve your new (automatically upgraded) license keys after a new major BricsCAD version is released.
THE STEP-BY-STEP GUIDE
Step 1: Accessing the Civil Workspace
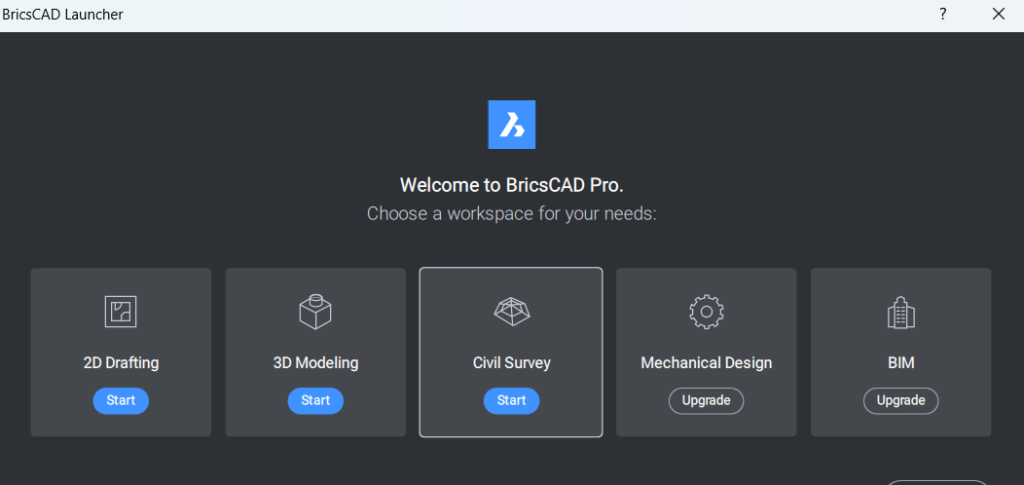
Launcher: Simply open the Civil Workspace from the launcher screen that appears when you double click the BricsCAD desktop icon.
You could also access the Civil workspace with the following options:
Commandline: Type ‘WORKSPACE’ in the commandline, then select ‘set Current’ and type ‘civil’
Ribbon: Right click on the tabs panel above the Ribbon and select ‘Workspaces’ and ‘Civil’ from the drop-down menus.
Status Bar: Right click the current workspace on the Status Bar and select ‘Civil’
Menu Bar: Select ‘Civil’
When you’re in the Civil Workspace, the Ribbon will change to show tools specific to Civil functions.

Step 2: Import File
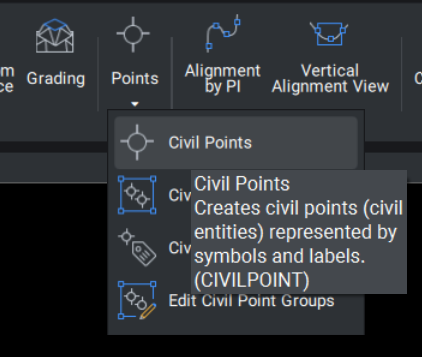
Click ‘Points’, ‘Civil Points’, then select ‘Import points from a file’ in the commandline.
Specify the point file format from the drop-down menu. Don’t worry if the format doesn’t match your data, I’ll get onto that.
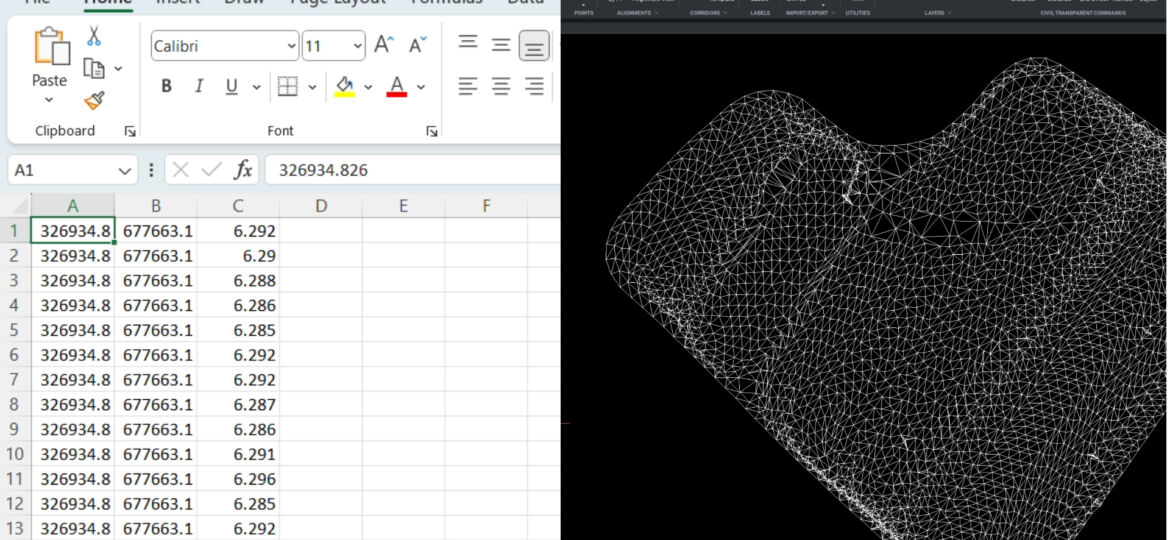
Click the three dots next to ‘File Name’ and browse to the required file. My file only has Easting, Northing and Elevation, so I’ll have to create a new file format.
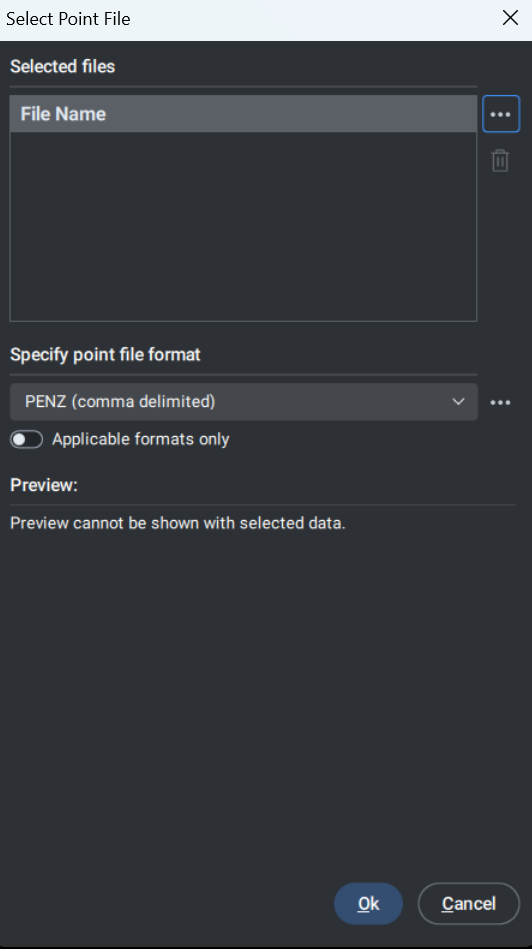
Select the three dots next to drop-down that says, ‘Specify point file format’. This opens the ‘Manage Point File Formats’ dialogue. Click the + symbol with a circle around it.
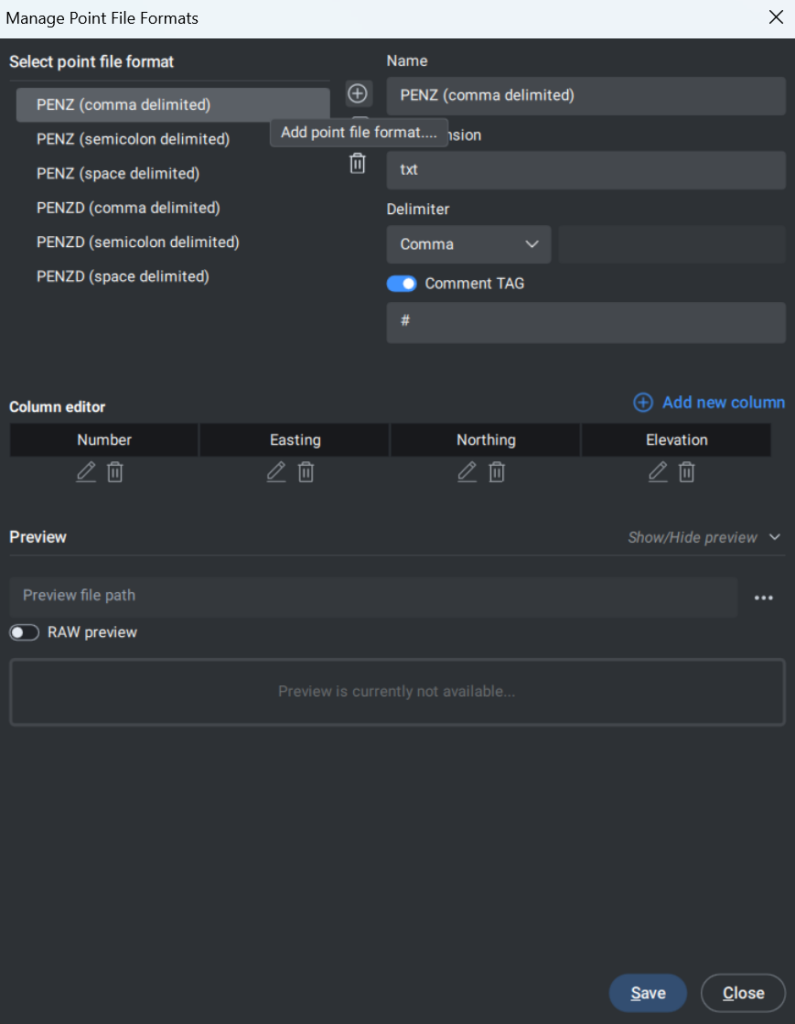
Select a name for the new file format. I’m calling mine ‘ENZ’ Hit ‘Save’ and ‘Close’.
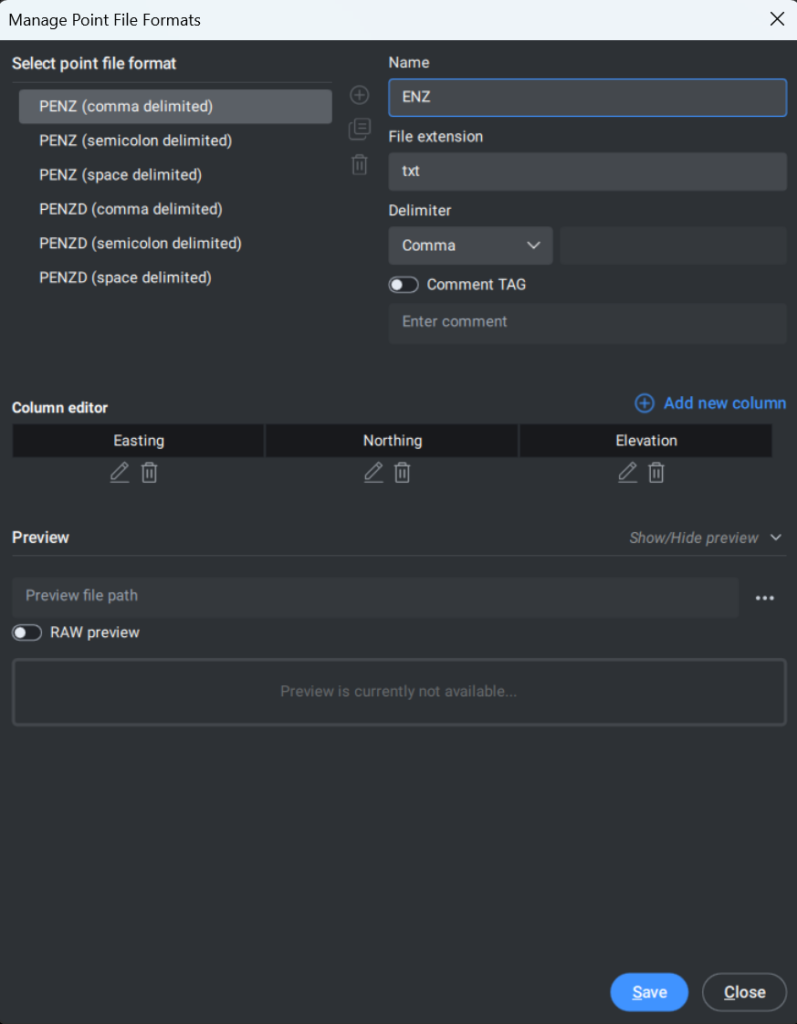
You can now select ‘ENZ’ from the drop-down menu.
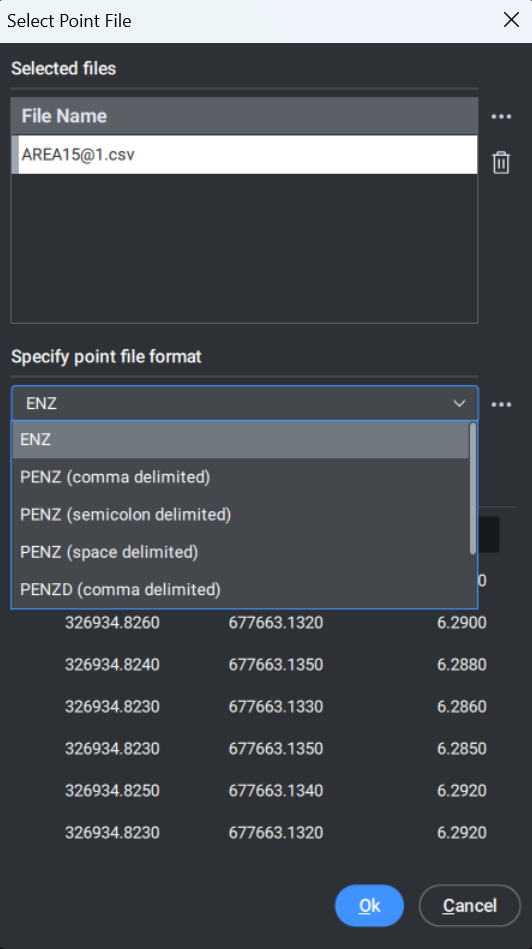
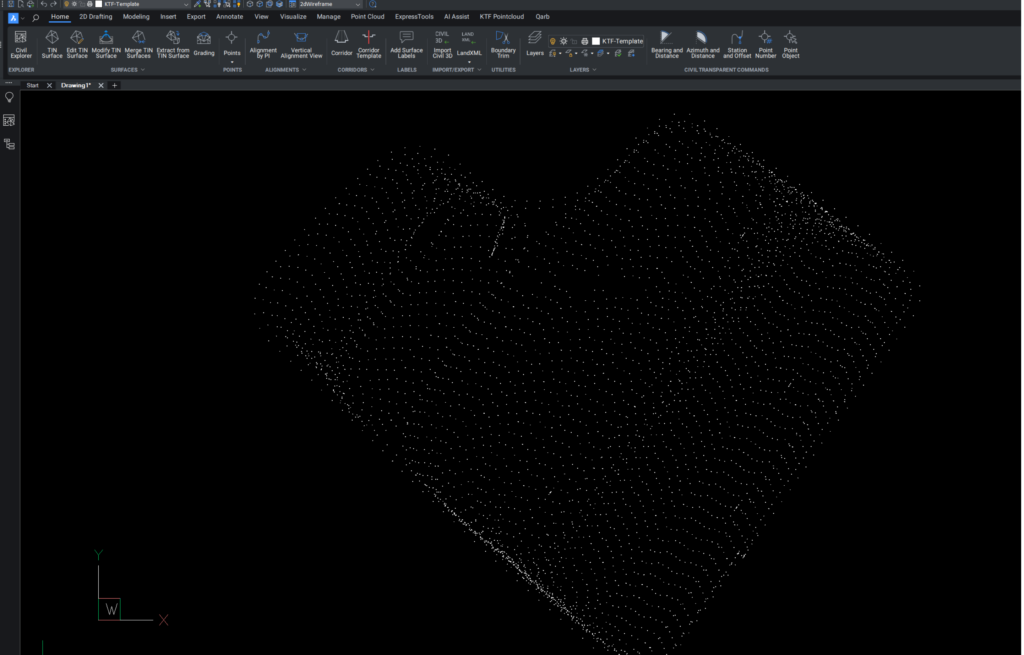
Your point file is now open, Zoom to Extents if necessary.
In my example, the annotation scale is incorrect so I’ll need to change it in the Properties panel.
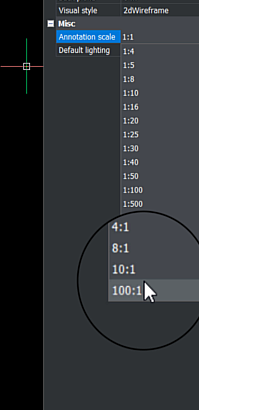
That’s much better now!
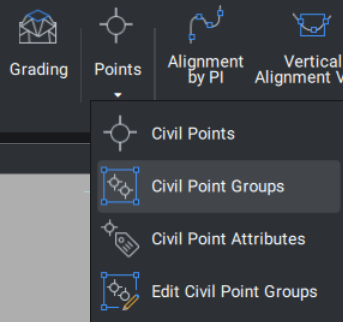
Step 3: Create a Civil Points Group
The data needs to be grouped. Point Groups are used to organise and manage points in a project. They also allow us to assign display styles and labels to points belonging to the same group.
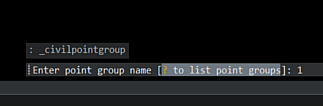
You will then be asked in the commandline to enter a point group name. I’m calling mine 1. After pressing enter, select the area that you want within the group. You now have a Civil Point Group.
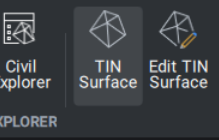
Step 4: Create a TIN Surface
You now need to select ‘TIN Surface’ from the Civil Ribbon.
Click on your Point Group in the drawing area and select ‘create from point Groups’ in commandline and type the name of your Point Group.

Hitting ‘Enter’ creates your TIN Surface
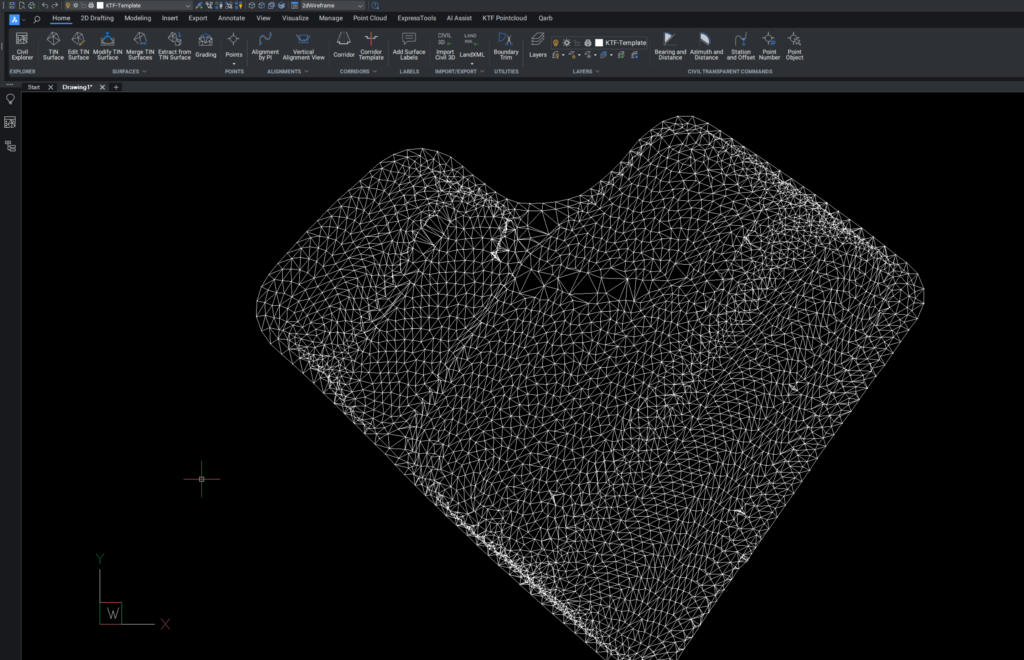
After the TIN Surface has been created, you can choose various options in the Properties panel, such as turning off the triangles and adding contours.
Troubleshooting Tips
Creating TIN Surfaces can sometimes bring unexpected challenges. Here are some common issues and their solutions:
Missing Points: Ensure all data points are included in the file and correctly formatted before importing.
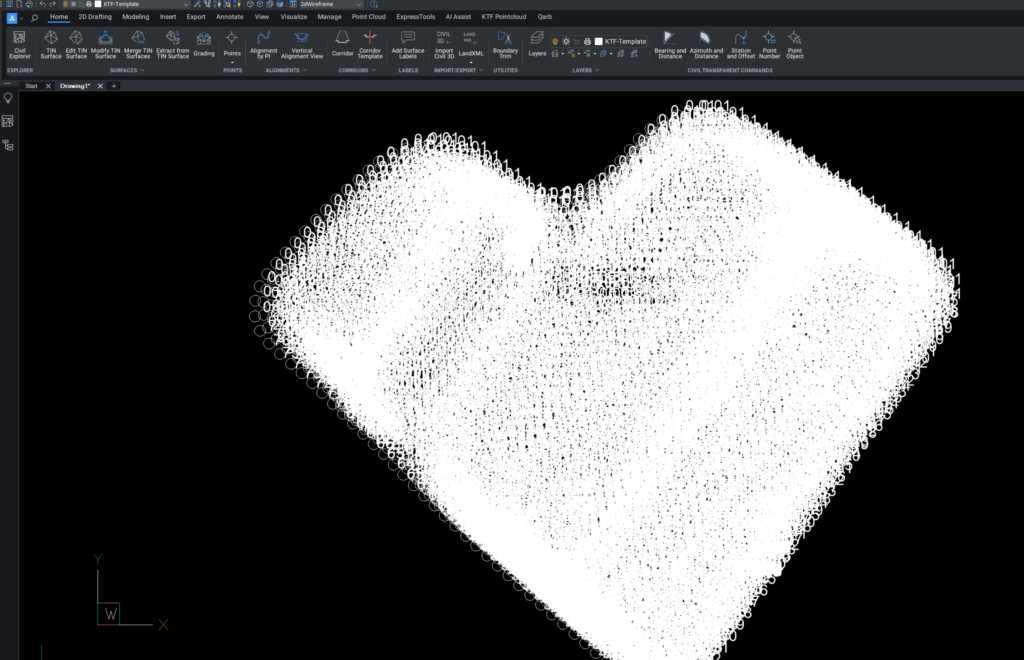
Incorrect Surface Generation: In the example in the video below, there were extraneous triangles outside the survey area that made the drawing untidy. You can use the ‘Edit TIN Surface’ to neaten the drawing with various options.
Conclusion
Congratulations! You’ve just expanded your BricsCAD skill set. Importing point data and creating TIN surfaces are valuable techniques in many fields.
As with any tool, practice is key, so we encourage you to apply these skills to your projects.
If you have questions, suggestions, or would like to see more content like this, please Contact Us or reach out directly.